


NEW VERSION AVAILABLE NOW – CLICK HERE TO BE REDIRECTED TO AJAXv2
ATA and B&D Compatible Remote
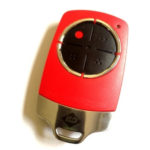
ATA PTX5v1, ATA PTX5v2 and ATA PTX6v1 Compatible Remote and B&D TB5, TB6 and TB7 Compatible Remote
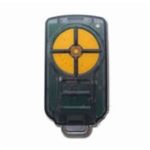
Introducing the CODE EZY – AJAX Remote (1002) : The Perfect Replacement for Your ATA PTX5 Remote Replacement & B&D Tri-Tran Remotes
Are you looking for a dependable replacement for your garage door remote? The CODE EZY – AJAX remote is a top-quality aftermarket solution, compatible with a range of popular remotes including the ATA PTX-5v1 and B&D Tri-Tran series. Whether you need a remote for your ATA or B&D motor, this versatile option has you covered.
Features:
- 1 x After Market Compatible Remote: Works seamlessly with multiple remote models including the ATA TrioCode and B&D TriTran Series.
- 2 Years Manufacturer’s Warranty: Confidence in quality and durability.
- Free Standard Shipping Australia-Wide: Convenient and cost-effective delivery.
Compatibility List:
Important Note:
While the CODE EZY remote features the RCM e2042 label on the back, this label does not determine compatibility.
 ATA PTX5v1 Remote ATA PTX5v1 Remote | 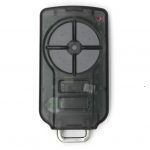 ATA PTX5v2 Remote ATA PTX5v2 Remote |  ATA PTX2v1 Remote ATA PTX2v1 Remote |
 ATA PTX2v2 Remote ATA PTX2v2 Remote | 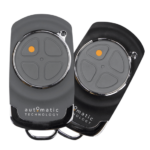 Click Here to Buy Genuine ATA PTX6v1 Remote Click Here to Buy Genuine ATA PTX6v1 Remote | 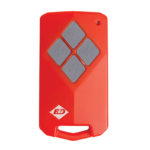 B&D TB5 Remote B&D TB5 Remote |
 B&D TB6 Remote B&D TB6 Remote | 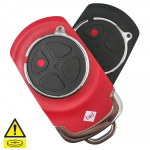 Click Here to Buy Genuine B&D TB7 Remote Click Here to Buy Genuine B&D TB7 Remote |
| ATA EasyRoller | GDO-6; GDO6v3; GDO6v4 |
| ATA Securalift | GDO7v2 |
| ATA Securalift | GDO7v3 |
| ATA ShedMaster | GDO8v3 |
| ATA Dynamo | GDO9; GDO9v2; GDO9v3 |
| ATA Enduro | GDO9; GDO9v2 |
| ATA | GDO9v2S2 |
| ATA Dominator | GDO9v3 |
| ATA Toro | GDO10v1 |
| NES-24v1; NES-24v3 | |
| RD-20v1 | |
| RD40v1 | |
| Elite | SGO-1; DCB-05(control board) |
| B&D Controll-A-Door S | CAD-S |
| B&D PanelPro | SDO-4v1 |
| B&D Controll-A-Door Advance | CAD-Advance |
| B&D Controll-A-Door Prodigy | CAD-P |
| B&D Controll-A-Door Power Drive | CAD-PD |
Frequently Asked Questions:
What models are compatible with the CODE EZY – AJAX remote?
The remote is compatible with a range of ATA and B&D remotes, including ATA PTX5v1, PTX2v1, PTX6, and B&D Tri-Tran v1, v2, mini, TB5, TB6, and TB7.
Can I use this remote with both ATA and B&D motors at the same time?
No, this remote is preset to ATA TriCode by default. To use it with a B&D system, it will need to be manually reprogrammed. It cannot be used with both ATA and B&D systems simultaneously.
What should I do if my remote stops working?
Ensure that the battery is charged and correctly inserted. If the issue persists, refer to the warranty information or contact customer support for assistance.
How do I program the remote?
Programming instructions are included with your remote, making it easy to set up and use right away. For more information click on CODING INSTRUCTIONS Tab
Reviews
There are no reviews yet.